A hunting knife can look complete but still be poorly specified. If one part is vague, the sample can miss the market.
Buyers should specify hunting knife parts by defining blade shape, point, edge, spine, tang, ricasso, choil, guard, handle scales, pins, butt, sheath, materials, heat treatment, finish, packaging, and QC requirements before sampling.
Quick buyer brief:
- Answer: A hunting knife should be specified as a complete blade, handle, tang, guard, sheath, and inspection system.
- Buyer context: This helps knife brands, outdoor brands, importers, wholesalers, distributors, and private label buyers prepare better OEM RFQs.
- Key checks: Blade profile, steel, hardness, grind, tang type, handle grip, fasteners, sheath retention, packaging, target market, and QC standard.
Planning a fixed blade or outdoor knife project?
Share your target use, blade size, steel preference, handle direction, sheath needs, quantity range, and packaging plan. Vast State can help turn it into a quote-ready specification.
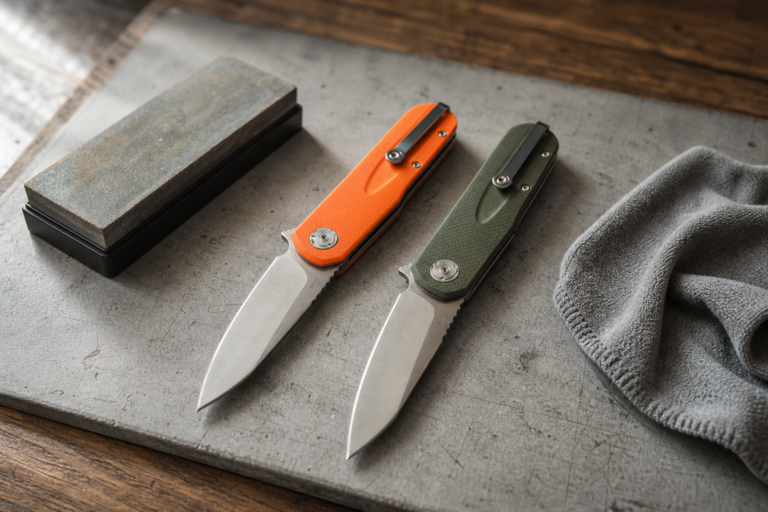
When a customer asks me for a hunting knife, I do not only ask for blade length. I ask how the knife will be positioned, what the user will do with it, what price range the buyer needs, and how the product should look in the package. A hunting knife is a system of parts. The blade affects cutting control. The tang affects strength and balance. The handle affects grip. The sheath affects safety and storage. At Vast State, I turn the visual anatomy of the knife into a manufacturing checklist so the buyer can approve a sample with fewer surprises.
What Are the Main Parts of a Hunting Knife?
Knife anatomy can feel like simple vocabulary, but loose terms create unclear drawings, weak RFQs, and sample revisions.
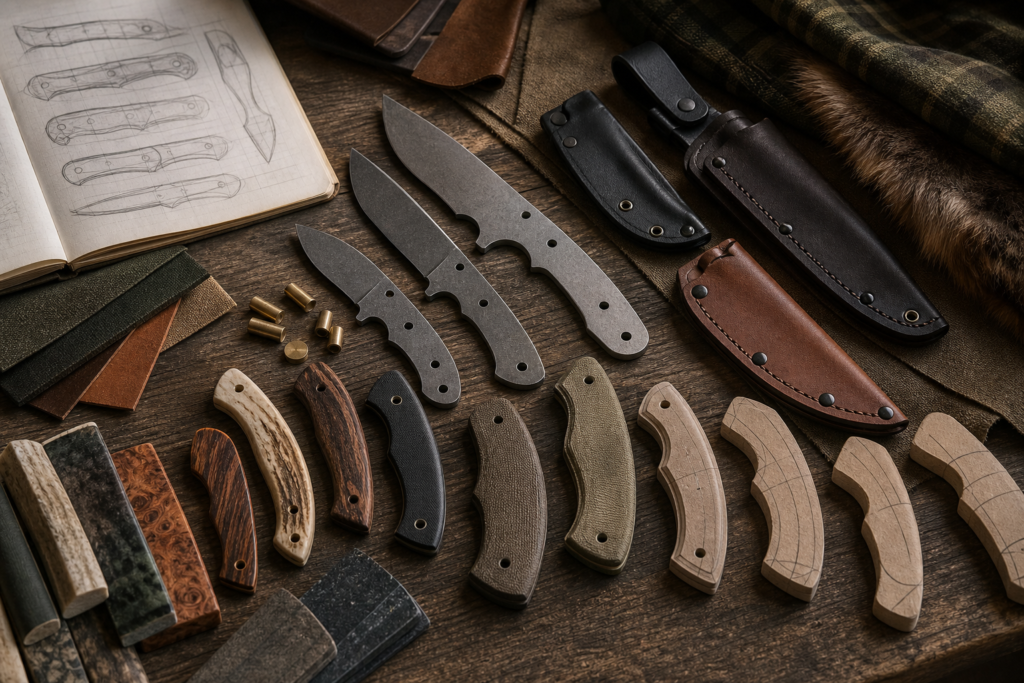
The main parts of a hunting knife are the blade, point, edge, spine, heel, ricasso, choil, tang, guard or bolster, handle scales, pins or rivets, butt, lanyard hole, and sheath.

I Translate Anatomy Into Manufacturing Language
I like anatomy guides because they give buyers and suppliers a shared language. But for OEM work, names alone are not enough. The buyer should connect each part name with a drawing, measurement, material, finish, and inspection point. For example, "handle" is too general. The RFQ should say handle material, thickness, contour, texture, color, fastener style, and whether the tang is exposed around the handle.
MSU Extension's guide to the anatomy of a knife explains common parts such as blade, handle, spine, tip, tang, bolster, butt, and rivets. That is useful as a basic vocabulary source. For hunting knives, I extend that vocabulary into product development. A hunting knife may need a different blade belly, stronger tang, more secure grip, and better sheath than a light kitchen knife.
The key point is simple. Every visible part has a production consequence. A sharp point needs careful grinding. A full tang adds strength but also adds weight and material cost. A guard may support safer grip, but it can complicate finishing. A sheath may seem like an accessory, but it controls storage, retention, and buyer confidence.
| Knife part | What it means | OEM specification point |
|---|---|---|
| Blade | Main cutting steel area | Steel, thickness, profile, grind, finish |
| Tang | Steel extension into handle | Full tang, hidden tang, or partial tang |
| Handle scales | Grip material attached to tang | Material, texture, color, fasteners |
| Sheath | Protective storage and carry part | Material, retention, belt loop, packaging fit |
OEM/ODM RFQ Checklist
Prepare these details to help Vast State review your project and provide a more accurate quotation.
| RFQ Field | What to Prepare |
|---|---|
| Project type | OEM from drawing / ODM private label / wholesale catalog |
| Product category | Folding knife / fixed blade / multi-tool / outdoor tool |
| Design status | Idea / sketch / 2D drawing / 3D CAD / physical sample |
| Target price | Ex-factory target price or retail price range |
| MOQ expectation | 500 / 1,000 / 3,000 / 5,000+ pcs |
| Logo method | Laser engraving / etching / printing / molded logo |
| Packaging | Standard packaging / custom retail box / Amazon-ready |
| Market | USA / EU / Japan / Korea / Middle East / other |
| Compliance needs | Buyer-specified testing / documentation / labeling |
| Timeline | Sample deadline / mass production deadline |
How Should Buyers Specify the Blade, Point, Edge, and Spine?
A blade outline can look attractive in a photo but fail the job. Shape must match real use and production control.
Buyers should specify blade profile, point shape, belly curve, edge length, spine thickness, grind type, blade height, sharpening target, and finish so the knife matches the intended hunting market.

I Start With the Cutting Job, Then Choose the Profile
The blade is not only a silhouette. It controls how the knife cuts, sharpens, and feels in the user's hand. A drop point may suit many outdoor and hunting products because it gives a controlled point and useful belly. A skinner-style blade may need more curve. A narrow utility blade may support more precise work. A heavy camp-hunting hybrid may need more spine thickness, but too much thickness can hurt slicing performance.
The buyer should specify the point, belly, edge, spine, heel, and grind. The point affects control. The belly affects slicing motion. The spine affects stiffness and weight. The edge geometry affects sharpening and cutting feel. The grind affects both performance and production cost. A full flat grind, hollow grind, saber grind, or simple V edge can create different results.
I also ask the buyer to define finish. Satin, stonewash, bead blast, coating, or polish all change the look and maintenance expectation. If the buyer wants a low-reflection outdoor finish, we can plan it. If the buyer wants a display-grade polish, we need more surface preparation. Blade parts should be specified together because one choice affects the next one.
| Blade feature | Buyer decision | Production concern |
|---|---|---|
| Point | Drop point, skinner, utility, or custom profile | Tip strength and grinding accuracy |
| Edge | Straight, curved, long belly, or mixed | Sharpening consistency |
| Spine | Thickness and shape | Weight, stiffness, and comfort |
| Grind | Flat, hollow, saber, or other | Cutting feel and grinding cost |
Why Do Tang, Ricasso, Choil, and Guard Details Matter?
The strongest-looking blade can still feel wrong if the base geometry is weak. The area near the handle does serious work.
Tang, ricasso, choil, and guard details matter because they affect strength, balance, sharpening access, hand clearance, assembly, finishing, and how confidently the user holds the knife.

I Treat the Handle Junction as a Stress Area
The tang is one of the first structure questions I ask about. A full tang usually supports strength and a solid feel because the steel extends through the handle profile. It also adds weight and material cost. A hidden tang can look cleaner and lighter, but it needs good design and assembly control. A partial tang may fit some cost-sensitive products, but the buyer should understand the tradeoff.
The ricasso is the unsharpened area between the cutting edge and the handle or guard. It gives space for grinding, branding, and safe handling during manufacturing. The choil can help sharpening access or finger positioning depending on design, but it should not be added just because it looks technical. A poorly shaped choil can reduce cutting length or create an awkward edge transition.
The guard or bolster area also matters. MSU Extension notes that a bolster can guard the hand from slipping off the handle in kitchen use. In hunting knife design, a guard can support grip confidence, especially when hands are wet or gloved. But a large guard may make sheath design harder. It may also add cost and finishing work.
| Base detail | What I check | Why buyers should care |
|---|---|---|
| Full tang | Steel follows handle shape | Strength, weight, and balance |
| Hidden tang | Steel enters handle block | Cleaner look and lighter feel |
| Ricasso | Unsharpened blade base | Grinding space and branding area |
| Guard | Hand stop near blade | Grip confidence and sheath fit |
How Should Handle Scales, Pins, Butt, and Texture Be Planned?
A hunting knife lives in the hand. If the handle is wrong, even a good blade feels unsafe and cheap.
Handle planning should define scale material, contour, palm swell, thickness, texture, fasteners, butt shape, lanyard hole, color, moisture resistance, and comfort for the target user.

I Design Handle Feel Around the Buyer Market
Handle material choices are both functional and commercial. G10 can give texture and stability. Micarta can give a warm outdoor feel. Wood can support traditional branding but needs moisture and color control. Rubber-like or polymer handles can support grip and cost control. Aluminum or metal handles can look modern but may feel cold or slippery if not textured.
The Canadian Centre for Occupational Health and Safety explains in its hand tool ergonomics guidance that tool design should consider weight, shape, fit to the user, and fit to the task. I apply that idea to hunting knife handles. The handle should not be a rectangle with nice material attached. It should fit the intended grip, hand size range, glove use, and knife weight.
Pins, rivets, tubes, and screws also need attention. They hold scales in place and affect appearance. A lanyard hole may help outdoor buyers, but it should be cleanly machined and placed where it does not weaken the handle. The butt or pommel area should match the product position. Some buyers want a rounded comfortable end. Some want an exposed tang end. Some want a decorative cap. Each option affects cost, polishing, and assembly.
| Handle part | Buyer choice | Production focus |
|---|---|---|
| Scales | G10, micarta, wood, polymer, rubber-like material | Color, texture, bonding, fit |
| Pins or rivets | Decorative or structural fasteners | Alignment and finish |
| Butt | Rounded, exposed tang, cap, or lanyard hole | Comfort and appearance |
| Texture | Smooth, milled, checkered, rubberized | Grip and cleaning |
What Should Buyers Specify About the Sheath?
Many buyers spend all their time on the knife and then rush the sheath. That creates storage, retention, and packaging problems.
Buyers should specify sheath material, blade coverage, retention method, belt loop or clip, drainage, stitching or rivets, insert liner, fit, packaging position, and safety instructions.

I Treat the Sheath as Part of the Knife
For fixed blade hunting knives, the sheath is not optional decoration. It protects the blade, protects the package, supports storage, and shapes the buyer's first impression. A poor sheath can make a good knife feel unfinished. A loose sheath can create complaints. A sheath that scratches the finish can damage sellable appearance before the product reaches the customer.
The American Knife and Tool Institute emphasizes knife safety points such as storing knives closed, in a sheath, or in a knife block in its knife education and safety materials. HSE also discusses secure storage in its safe use of knives guidance. These sources are not hunting knife manufacturing specifications, but they support a practical idea: storage and protection are part of responsible knife design.
The buyer should choose sheath material based on product level. Leather or leather-like sheaths can support traditional hunting products. Molded plastic can be repeatable and cost-controlled. Nylon can support lower-cost or kit-style products. Hybrid sheaths can add value but need more inspection. The sheath should hold the knife, cover the edge and point, fit the package, and match the brand.
| Sheath detail | What to specify | Why it matters |
|---|---|---|
| Material | Leather-like, molded plastic, nylon, hybrid | Cost, look, and durability |
| Retention | Friction, snap strap, molded lock, pouch fit | Prevents loose storage |
| Attachment | Belt loop, clip, dangler, or pack option | Matches user activity |
| Protection | Tip coverage, liner, drainage, finish contact | Protects knife and user |
How Do Steel, Heat Treatment, and Hardness Affect Each Part?
The same knife shape can perform very differently with different steel and heat treatment. Material decisions must be practical.
Steel, heat treatment, and hardness affect edge holding, toughness, corrosion resistance, sharpening, tang strength, surface finish, and consistency across bulk hunting knife production.

I Connect Steel Choice With Real Manufacturing Control
Blade steel is often the first question a buyer asks. I understand why. Steel affects edge performance, corrosion resistance, sharpening, and marketing position. But steel is not only a name on a product page. It needs correct heat treatment, grinding control, hardness testing, and surface finishing.
Alleima describes 14C28N knife steel as having a useful combination of edge performance, high hardness, and corrosion resistance for knife applications. That makes it a good example when discussing balanced stainless knife steel. Still, the best steel depends on the buyer's market and price range. D2, 9Cr series steels, 8Cr series steels, 14C28N, 420 series steels, and other options all serve different commercial needs.
Hardness should also be measurable. The NIST guide to Rockwell hardness measurement explains why good practice matters for hardness testing. In production, I want the buyer to define the target range and the supplier to verify it with a controlled method. If the blade is too soft, the edge may not satisfy the market. If it is too hard for the design, toughness may suffer.
| Material decision | What it affects | Buyer check |
|---|---|---|
| Steel grade | Edge, corrosion, cost, marketing | Match to target price and use |
| Heat treatment | Hardness and toughness | Define target hardness range |
| Surface finish | Appearance and maintenance | Match packaging and user expectation |
| Tang thickness | Strength, weight, balance | Check sample feel and structure |
How Should Buyers Build a QC Plan for Hunting Knife Parts?
Final inspection cannot fix a weak specification. QC works better when every knife part has a clear acceptance point.
A hunting knife QC plan should check blade dimensions, edge consistency, hardness, tang and handle fit, guard alignment, fastener finish, sheath retention, appearance, packaging, and approved-sample matching.

I Inspect the Knife as a System
For hunting knife production, I like to inspect from raw inputs to final packaging. Incoming steel, handle materials, pins, rivets, sheath parts, and boxes should be checked before assembly. In-process checks should cover blade profile, hole placement, grind symmetry, heat treatment, hardness, handle fit, and surface finish. Final checks should cover sharpness, appearance, sheath retention, packaging, and matching to the approved sample.
The ISO page for ISO 9001 quality management supports the idea of meeting customer and regulatory requirements through a controlled quality system. I apply that mindset in a practical way. The buyer's requirement should be clear. The supplier should check it. If a defect appears repeatedly, the process should be corrected, not only sorted at the end.
Hunter education also supports the importance of safe, controlled knife use. The Texas Parks & Wildlife Department hunter education manual notes that knife cuts are a common hunting injury and recommends careful cutting, sharp tools, and not rushing. I do not turn that into user instruction. I use it as a reminder that hunting knife design, sheath fit, handle grip, and packaging information should support responsible use.
| QC stage | What to check | Why it matters |
|---|---|---|
| Incoming | Steel, handle material, sheath parts, fasteners | Prevents weak inputs |
| In-process | Grind, holes, heat treatment, handle fit | Catches defects early |
| Functional | Grip feel, sheath retention, edge, balance | Confirms product experience |
| Final | Appearance, packaging, labels, approved sample | Protects sellable quality |
What Should Buyers Include in a Hunting Knife Parts RFQ?
An RFQ with only a photo leaves too much for the supplier to guess. Guessing slows the project.
A hunting knife parts RFQ should include target market, blade profile, steel, hardness, thickness, tang type, handle material, guard, sheath, finish, logo, packaging, MOQ, target price, and QC requirements.

I Make the RFQ Visual and Measurable
For a hunting knife RFQ, I want the buyer to send a drawing or reference image, but I also want measurements. The RFQ should include blade length, overall length, blade thickness, blade height, edge type, grind type, tang type, handle material, handle thickness, pin style, guard detail, butt shape, sheath material, packaging, target market, target price, and expected order quantity. If the buyer does not know the final steel yet, we can suggest options based on price and market position.
The buyer should also say what matters most. Some brands need traditional appearance. Some need cost control. Some need a high-grip handle. Some need a gift-box presentation. Some need a field-use outdoor tool with a simple sheath. The same anatomy can create very different products.
I also recommend adding QC language to the RFQ. A buyer can ask for hardness testing, blade profile tolerance, handle gap limit, sheath retention check, sharpness check, packaging drop protection, or approved-sample matching. These details help the supplier quote more accurately. They also make the project easier to manage after the first sample.
| RFQ field | What to provide | Supplier response should cover |
|---|---|---|
| Blade | Length, profile, steel, thickness, grind | Feasibility, cost, and performance tradeoff |
| Handle | Tang, scale material, texture, pins | Comfort, assembly, and appearance |
| Sheath | Material, retention, attachment, packaging fit | Safety, storage, and cost |
| QC | Hardness, dimensions, fit, finish, packaging | Inspection plan and sample standard |
Turn this article into a fixed blade project.
Send your target use, blade size, steel, handle direction, sheath needs, quantity, and packaging plan. Vast State can help shape it into a quote-ready project.
Conclusion
I specify hunting knife parts by turning anatomy into clear material, structure, sheath, QC, and RFQ requirements.
Source Notes
- MSU Extension knife anatomy supports basic terms such as blade, handle, spine, tip, tang, bolster, butt, and rivets.
- AKTI knife education and safety supports safe storage, sharpness, and responsible knife education.
- Texas Parks & Wildlife hunter education manual supports the importance of careful knife use in hunting contexts.
- CCOHS hand tool ergonomics supports handle and tool-fit discussion.
- Alleima 14C28N knife steel supports steel selection and hardness discussion.
- NIST Rockwell hardness guide supports controlled hardness measurement.
- ISO 9001 supports the process-control approach to QC and customer requirements.